Welcome to Stormflight Designs

www.StormFlightDesigns.com


If you've always wondered about how jewelry is made and fine craft is done, this is the blog for you! Our intent is to show you the step-by-step of creating jewelry from a silver-smith's and lampworker's point of view. We'll throw in some other interesting craft-work too. Consider this a "tutorial-light" blog in a way. You'll get to see the creative process from start to finish. Sometimes it may take a while to get to the finish, so please be patient! We often have to wait for the muse to strike--sometimes in the middle of a different project!

Friday, February 26, 2010

Bumblebee - Step 4

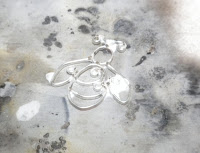
Ok, now that I have all the parts for the bee it is time to put it together and solder it! It often takes a few times to get all of these parts soldered so they are strong and will holdup to everyday wear.

It looks like quite a mess, and really it is...but don't worry, it will all clean up.

I finally got it all soldered. It had to stay in the pickle pot for a bit to get all the discoloration off from the heat of the torch. It looks great now and its ready to be filled in with the filigree wires.

Bumblebee - Step 3

So, now lets get down to bending some wire !
The hard part is to get the wire to do what you want without work hardening it too much. I am using special filigree wire that I purchased from Victoria Lansford for this project.


It looks funny now, but it will get tweaked a whole lot more! I still haven't figured out quite how I want to put the head on--the antenna will come from the top somehow...I'll have to do some trimming and soldering for that.

Stay Tuned!

Bumblebee - Step 2

So, now that I have my supplies lined up and coffee consumed, it's time to make my design. I know I am making a bumblee-bee. Its always good to know what you are going to make :)

Now I have to draw the final design...I checked out bee images on the internet as a reference and then collaborated with Jamie to get her input (those are her hands there)


Ok, I've decided on what I want.
Now to make it!

Creating a Filigree Bumblebee- Step 1


Well, I have finally gotten around to working on this Bumble-bee that my Dad has asked for...I have to get it done and sent to him by Mother's Day (shhh...don't tell my Mom!) So, I have decided to capture the process here with pictures so you can see what goes into making a filigree piece.

Step One: Gather tools and supplies. Coffee if the #1 supply I use.

Tuesday, February 23, 2010

Step by Step Filligree

Keep an eye out for pictures of my next filligree project...I have been commissioned to make a filligree bumblebee necklace for Mother's Day. I'm in the process of coming up with the design right now and then I will show you each step in the creation process...

...unless I forget my camera!

So, stay tuned!

Tuesday, February 16, 2010

Russian Filligree Photos


Ok, as promised, here are a couple of pictures of my first try at Russian Filligree! I have a long way to go to become really good at this technique! But it is lots of fun to do... I will have to do a lot more before I move on to making rings!

Monday, February 15, 2010

Russian Filligree

Wow, we've been introduced to Russian Filligree by stumbling upon Victoria Lansford's site. After purchasing and watching her DVD a few times we've jumped in to try it...well, it isn't as easy as she makes it look! She is amazing....I have a link to her site under "favorite links" because her work is so beautiful! I hope to one day produce something half as good as hers! I'll post my attempt here when it is done!

Saturday, February 13, 2010

OMG!


Being a family of computer types (mostly) and gadget lovers (ok, call us geeks or nerds!), I had to do something with my old keyboards...so my daughter requested a necklace. Well, during the learning curve I melted a few of the ones she wanted (her initials...). Luckily by the time I figured out how I would set the keys on the silver, there was still a few keys left! She chose her favorite number and wears it all the time. So, I've made a few bracelets and necklaces since then. Here is my latest...

Goodbye Dragonfly

So, the single garnet dragonfly is flying off to Arkansas! I hope it will be happy where it lands!

Friday, February 12, 2010

DragonFly Update!


So, Ive finally finished polishing the silver and setting the stones on the dragonflies! What do you think? The single stone dragon fly has a 5mm rhodolite garnet, very clear and pretty. The two stone dragon fly is a tad smaller with 4mm iolite and a 8x4mm mother of pearl. I'm not sure which I like best!


Monday, February 8, 2010

Working on Dragonfly Pendants

I got a request for a dragonfly pendant with a gemstone...so of course, I couldn't just do one, I had to make two at the same time...One is all done with the Rhodolite Garnet cab set and the other is still in the pickle pot. It will have a Iolite Cab and a mother of pearl cab. The finished one looks great, I hope the other one turns out just as good! I'll post pics when I'm all done.

Saturday, February 6, 2010

Snow Storm!

We've been hit by a nice snow storm--probably at least a foot, I haven't gone out to inspect it yet! I anticipate a day of shoveling! I hope I will have enough energy left to work on my latest project. I am doing a special commission. It will be a dragonfly pendant...hope it turns out well.

Tuesday, February 2, 2010

Welcome to StormFlight Designs

Hello Everyone! This is my first foray into the world of blogging...My plan is to show you my projects in progress and see how they transform from silver to beautiful jewelry!

I'm sure I'll add some other interesting things along the way--like the brownie recipe I just made that was sososososo awesome!