Welcome to Stormflight Designs

www.StormFlightDesigns.com


If you've always wondered about how jewelry is made and fine craft is done, this is the blog for you! Our intent is to show you the step-by-step of creating jewelry from a silver-smith's and lampworker's point of view. We'll throw in some other interesting craft-work too. Consider this a "tutorial-light" blog in a way. You'll get to see the creative process from start to finish. Sometimes it may take a while to get to the finish, so please be patient! We often have to wait for the muse to strike--sometimes in the middle of a different project!

Sunday, December 19, 2010

"Ringing" in the New Year

I have a Christmas party to go to tonight and I am bringing a handful of rings I made this week...I'm going to just put the pile on the table and let everyone take their pick...hopefully the sizes will work...that's always tough!  We will see how it goes.


I did some wire wrapping/knot tying for these rings.  My first go at wire wrapping.  Boy is that hard!  For those of you who wire wrap---kudos to you!  yow!  I couldn't make two to turn out the same even thought I was working off the same pattern.


So, I decided to leave some shinny silver and some I put a patina on.  I'm not sure which I like more.  It will be interesting to see what my friends like.
 I used fine silver (99.9% silver) because it doesn't work harden as quickly.
For all those of you baking for Christmas, try making rings instead!

Sunday, October 17, 2010

Creativity Begins Anew!

Slowly, but surely we are making progress.  Boy I'm glad we have another bathroom to use!

I have now painted the ceiling and the walls.  We are stalled a bit now while waiting for the fixtures to arrive so the plumber can install the bathtub, the faucets and shower things.  Then we'll get to get the tiling done !  Can't wait. 

close up of design
So, how am I getting creative finally? 

I am creating pewter repousse' for the light switch covers...I just finished the first one and thought I would share it and see what you all think. 

The room will be very earthy...stone border throughout the room and a nice soothing green on the walls.  So, I chose to do vines and leaves for the design on the switch plates.  I decided not to put a dark patina on them, just keep them soft pewter.

Now I just have to quit being lazy and get some more made!  Hopefully I'll finish them by the time the fixtures arrive!  I will keep you posted.

Tuesday, September 28, 2010

Life Gets In The Way of Art

We all have experienced the annoyance of life getting in the way of all the fun things we want to do.  I'm no exception to this!  I wish I was!

So what has been getting in the way of my creativity?  A bathroom remodel.  So, while I am happy about the remodel, I'm anxious to get it finished.  In order to save some money, we decided to do the demolition ourselves.  What a great way to work our your aggressions!  I've slept pretty well after a full day of breaking tile and knocking out walls.


We have the bathroom pretty much gutted now... I sure am thankful for a handy and strong husband! 

There's nothing left of the shower except a hole in the floor.  Boy was that disgusting and moldy. Its a good thing we decided to do this just to get rid of that.

Tomorrow the carpenter comes to install pocket doors (yea, no more doors hitting each other--seriously!).  Then the tilers come.  We had the good sense not do do this ourselves.  We're just getting too old to 'do it yourself ' anymore.  I have to save my energy for silver work!

So, hopefully in a few weeks I will get to dive into my artwork again.  I am thinking ahead to what I need to make for Christmas time gift giving.

Stay tuned!

Wednesday, September 1, 2010

What I made at Artist Camp this Summer (or, what I did on my summer vacation)

I've finally gotten around to taking a few picturess of the items I made in my Silver-Smithing class in GA a few weeks ago.

The first project we did was a heavy gauge twisted bangle bracelet.  After twisting the wire and shaping it into a bangle, we soldered it and filed and polished it up.  Came out as a nice, classic bangle.  The weight of the silver feels great on the wrist without being bulky.


The second project we were given was to make a ring.  What I really like about this ring is the shank detail...we had to make silver balls and solder them into notches we made in the shank.  It is very beautiful.  I had a large Labradorite stone that was perfect for this ring.  It has a gorgeous green flash.  The ring is large, bold and beautiful!


So then we were on our own to create as we wished with the instructor's guidance.  I choose to make a bracelet with 5 gorgeous Larimar stones I had brought with me...Here is what I made...It fits perfectly and the silver feels so smooth and almost velvety.  I had to set the stones when I got back because I ran out of time.  The bracelet has a lot of silver which increases its value on top of the wonderful Larimar stones.


I highly recommend the instructor that I had for this class:  Bill Cady.  He was fun, patient and very tolerant to let us learn what we wanted.  The school is the William Holland School of Lapidary Arts in Young Harris, GA.  Its is well worth the drive!

Sunday, August 22, 2010

My week at Art 'Camp" in GA

I've just spent another week in the hills of GA for a week of learning more silver-smithing techniques.  I had a great time as usual.  If you ever get the chance, I highly recommend the school:  William Holland School of Lapidary Arts.  It is so beautiful I wish I could stay longer!
Every day we'd make our way down to the dining hall for breakfast and then off to class until lunch.  Then back to class until dinner.  After dinner there is always some activity to keep you busy.  There is an Auction to benefit the school (it is non-profit) and a tailgate night when everyone can put out their work for sale.  I love looking through the stones to add to my collection.

We brought home a little passenger...


Accommodations:


The dinning hall...
My classroom...


Work in progress. 

I will post pictures of the items I made soon.  My last project is 3/4 of the way done...I'll keep you posted on the progress!

I had a great time!

Monday, July 5, 2010

Finishing the Bracelet

So, I've got all my links woven into this awesome bracelet.  Now I have to work on the clasp and get a great stone to match the splendor of the silver weave.


This stone is a wonderful Ammonite that I found at a local gem and Mineral show.  I hesitated to purchase it at first because it was more than I usually pay for a stone...I even tried to haggle.. but it was so spectacular that I bit the bullet went ahead and got it.  I am so glad I did!  It has been waiting for just the right setting.  It is from Russia...it has yellow calcite, pyrite and opal. 


This is the setting I made for the stone.  I am experimenting with Argentium silver.  I made the large oval out of Argentium.  The bezel is fine silver and the clasp part is regular sterling.  I am starting to really like working with Argentium, but the verdict is still out.  I'll keep you posted...

So, after polishing all the pieces and checking the fit, it is time to set the stone.  This wasn't too difficult since the stone is quite large (almost an inch wide).    Then I put the bracelet in the loops I formed to hold it onto the clasp, and va'la~done!  I am so pleased with how it turned out!  It fits me perfectly and I feel like million bucks when I wear it.
 
What do you think?

Thursday, July 1, 2010

My Latest: Side Weave Mesh Bracelet -- The beginning

The bracelet I am making was originally created by Victoria Lansford.  I am following the directions in her book "All Chained Up". 

First of all, I have to make a bazillion fused fine silver loop...this is just a small pile of what I needed.

I can't tell you how many I blobbed up with the torch!  oh well :)

The next step is to form them all into links--hopefully they are all uniform!  So, when I was satisfied with that, I get to begin making the chain.


I am very happy with how this is progressing!  The links are going together pretty well.  I really have to tweak them so they are perfect (well, as perfect as I can get them since I'm not a machine!).    Once I get all the links done, I will begin to work on the clasp. 

So, stay tuned for the next blog that will show you the stone I've picked and the setting for it.   Of course, when it is all finished, I will show you that too!  So far I am loving it!

Monday, April 26, 2010

What? Where is my latest work?

Well, I have been quiet for a while here....this is just a quick note to let you all know that I haven't forgotten about this blog!  I just haven't been able to devote any length of time to one project where I can remember to take pictures as I go along!

I will be heading down to Young Harris, GA next week to take an enameling class...so look for pictures of my experience there to come shortly after I get back.  It is a wonderful school--William Holland School of Lapidary Arts.  If you ever can sign up for a class there, I would highly recommend it.  That is where I learned Silversmithing. 

So...stay tuned~!

Wednesday, March 31, 2010

Part 3 - Pewter Repousse' Jewelry Box

I have just a few more dots to finish and a couple of other small details...

On some designs I like to accentuate the work by making a design in the negative background space.  I usually always do this with my Celtic design-work.  On this piece it is very busy and it really doesn't need that.

I need to fill in the hollow areas on the back so that the finished piece doesn't get smushed (yes, that is the technical word...).  I use a very thin paste (again from Mercart).  There are probably other things you can use, but this is just what I have used in my work.  I like the product and it works well.  Although they have a new liquid product that looks promising.

So, turn the project over and fill in all the pushed out areas with the filler paste even with the flat metal.  Let it dry.  You don't want any blobs sticking up or it will make it uneven when you attach it to the box.

I like to use a patina on my projects to accentuate the intricate detail.  I use a tin-patina since this Pewter is tin coated to protect against the lead.  This is simply brushed on to the desired depth of blackening and then rubbed off so that is only left in the creases.  Then give it a final rubbing with paste polish.

I attached it to the jewelry box and it is all done!  I think it has turned out just wonderfully!  The box itself is a great wooden box, velvet lined with the added feature of being a music box as well!  It plays "If I could teach the world to sing"

This box has been sold and is on it's way to England! 


If you have any questions, just let me know!

Monday, March 29, 2010

Part 2 - Pewter Repousse' Jewelry Box

Ok, so I've been moving right along with my design.  Here is how it looks so far...I'm about half way done at this point.

I continue with the same process of pushing out metal (being careful not to push too hard and making a hole!), flattening out other areas.


Here you see an example of where I still have to push out some dots.  I have a special "cup and ball" tool I use for this.  You can purchase them in different sizes.  You use the ball end on the back of the metal to push out the dot.  Then flip the metal over and place it on a smooth hard surface (my corian countertop works just great) and use the cup side of the tool to push the metal down around the dot.  This accentuates the dot.  I have arrows showing where the dots are still to be done.

I will continue to work on the rest of the dots and hopefully not miss any!  I if miss any, you will be able to see it from the front of the metal...not good.  I've got to carefully look over the piece before I decide I am all done!

Look for the next blog which shows the finished product!  I will be putting it up on my Website for sale soon.

Sunday, March 28, 2010

Pewter Repousse' Jewelry Box

I have just finished a creating lovely pewter repousse' design for a musical jewelry box.  It is really a celebration of Spring...despite this little cold snap!


The first thing I had to do was decide what picture I wanted to reproduce in Pewter.  I borrowed some design books from my friend Jamie which include CD's so you can size the picture to fit what you are doing.  This is the picture I choose.  It has some birds and flowers so it just seemed to say "Spring is coming"  when I saw it. 

Once it was printed out to size, I had to transfer the design to the pewter sheet.  I just tape the design to the metal and use an embossing stylus to trace my lines.  Using a ruler is a must to get straight lines.  There is nothing worse than putting a design on a box and then seeing that the lines don't match up with the lines of the box.

I use tools and supplies that I purchase from http://www.mercartusa.com/icat/icat.htm
They specialize in repousse' supplies and have everything I need in one place.  That saves on the shipping costs.  Plus, their prices are good overall.

It is really important to transfer your design carefully.  If your lines are wavey and uneven at this point, that is probably how they will look when you are done!

These are the basic tools I use to begin: the stylus embossing tool and the refiner tool (plastic tipped tool).  The Refiner deepens the design.  You constantly work on both sides of the metal sheet (flipping back and forth) to bring the design into focus.  I use an artist's paper stump to flatten areas or add depth.  To flatten, use on a hard smooth surface.  To add depth, use on a piece of suede.  You can round at this point with the suede underneath and even add more details.

Here is the top side of the pewter showing my lightly pressed-in design as well as the areas that I have pressed out already.  I work little by little in one area and move along as I finish each detail.  I  find that the easiest way to work.  I go back at the very end and add any finer details that I feel are needed.  But overall, I finish each design before moving on to the next element.


Stay tuned for the next blog to see the final steps...


Sunday, March 14, 2010

Urban Edge - Sterling ring


Sometimes things are created by accident--I was working on a project that didn't cooperate with me. So I decided to morph it into something else. This is the something else that emerged! It is totally and 100% opposite of what I was originally intending, but totally cool in it's own right.

Its a lesson we can apply in our own lives--things don't always go as planned, but they can be good, unique and positive just the same!

Saturday, March 13, 2010

Foodie Pendant Project

Well, its a rainy Saturday, what would be better than working on some jewelry? Well, nothing that I can think of...but it looks like I have a long list of things to do before I get to do that!

So, my sister, Lyndi, has me involved in a give-away for her blog: http://www.nwafoodie.blogspot.com
(It won't be posted until the pendant is done, so, keep an eye out, but in the mean-time, enjoy her great posts).

I am creating a pendant for her for this give-away...you'll have to check out her blog to get the details. I have been creating this pendant out of filigree frame silver wire. Right now it is in the pickle pot getting cleaned up. I have to do the polishing work before it is revealed!

Stay tuned!

Sunday, March 7, 2010

Bumblebee Revealed!


So, the bumblebee is all done and looking great!

Now I have to send it to my Dad! I hope he likes it and that my Mom will like it when he gives it to her.

If you have any questions about this project, feel free to ask!

Saturday, March 6, 2010

Bumblebee - Step 8

Time to polish up the piece. Its going to start looking really good soon!


Polishing is really messy! You have to gradually go through different grits of polishers without touching the delicate filigree wires.


Final polishing with a cloth.


Friday, March 5, 2010

Bumblebee - Step 7

All soldered!

You have to carefully check to make sure all the wires are securely attached and nothing is going to catch on your favorite sweater. go back and attach anything that is loose. Get it right before you move on to cleaning it up and polishing.

Thursday, March 4, 2010

Bumblebee - Step 6


So I have continued to add the filigree wires one by one. When I finished that I had to do the tricky part--soldering it without melting the delicate wires (like that has ever happened...). But you've got to get the solder on first.


The solder I use is a special blend of metals and flux made by Victoria Lansford. You want it just in the right spot...not too much or then it looks blobby, not too little or then it won't hold the wire intact. But, its better to have too little because you can always go back and fill more in. A pain, but better than trying to file solder off.

Wednesday, March 3, 2010

Bumblebee - Step 5

I was finally able to work on this little bumblebee again! It drives me crazy when things get in the way of my silver work...just small things like, eating, the family, etc.

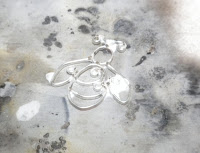
Ok, so last time I got it all soldered and cleaned up. So, now it is time to add the filigree pieces. The filigree wire is very small, twisted, flattened wire. One of the hardest things to do is figure out how to put it in the piece.

Just fill it in piece by piece until it looks good. I moved so many around until I finally got the look I wanted.

Friday, February 26, 2010

Bumblebee - Step 4

Ok, now that I have all the parts for the bee it is time to put it together and solder it! It often takes a few times to get all of these parts soldered so they are strong and will holdup to everyday wear.

It looks like quite a mess, and really it is...but don't worry, it will all clean up.

I finally got it all soldered. It had to stay in the pickle pot for a bit to get all the discoloration off from the heat of the torch. It looks great now and its ready to be filled in with the filigree wires.

Bumblebee - Step 3

So, now lets get down to bending some wire !
The hard part is to get the wire to do what you want without work hardening it too much. I am using special filigree wire that I purchased from Victoria Lansford for this project.


It looks funny now, but it will get tweaked a whole lot more! I still haven't figured out quite how I want to put the head on--the antenna will come from the top somehow...I'll have to do some trimming and soldering for that.

Stay Tuned!

Bumblebee - Step 2

So, now that I have my supplies lined up and coffee consumed, it's time to make my design. I know I am making a bumblee-bee. Its always good to know what you are going to make :)

Now I have to draw the final design...I checked out bee images on the internet as a reference and then collaborated with Jamie to get her input (those are her hands there)


Ok, I've decided on what I want.
Now to make it!